TREAT - Scheduling
Creating an Appointment
Overview
You can add an appointment directly from any calendar view. The view you start from determines how you pick the time slot.
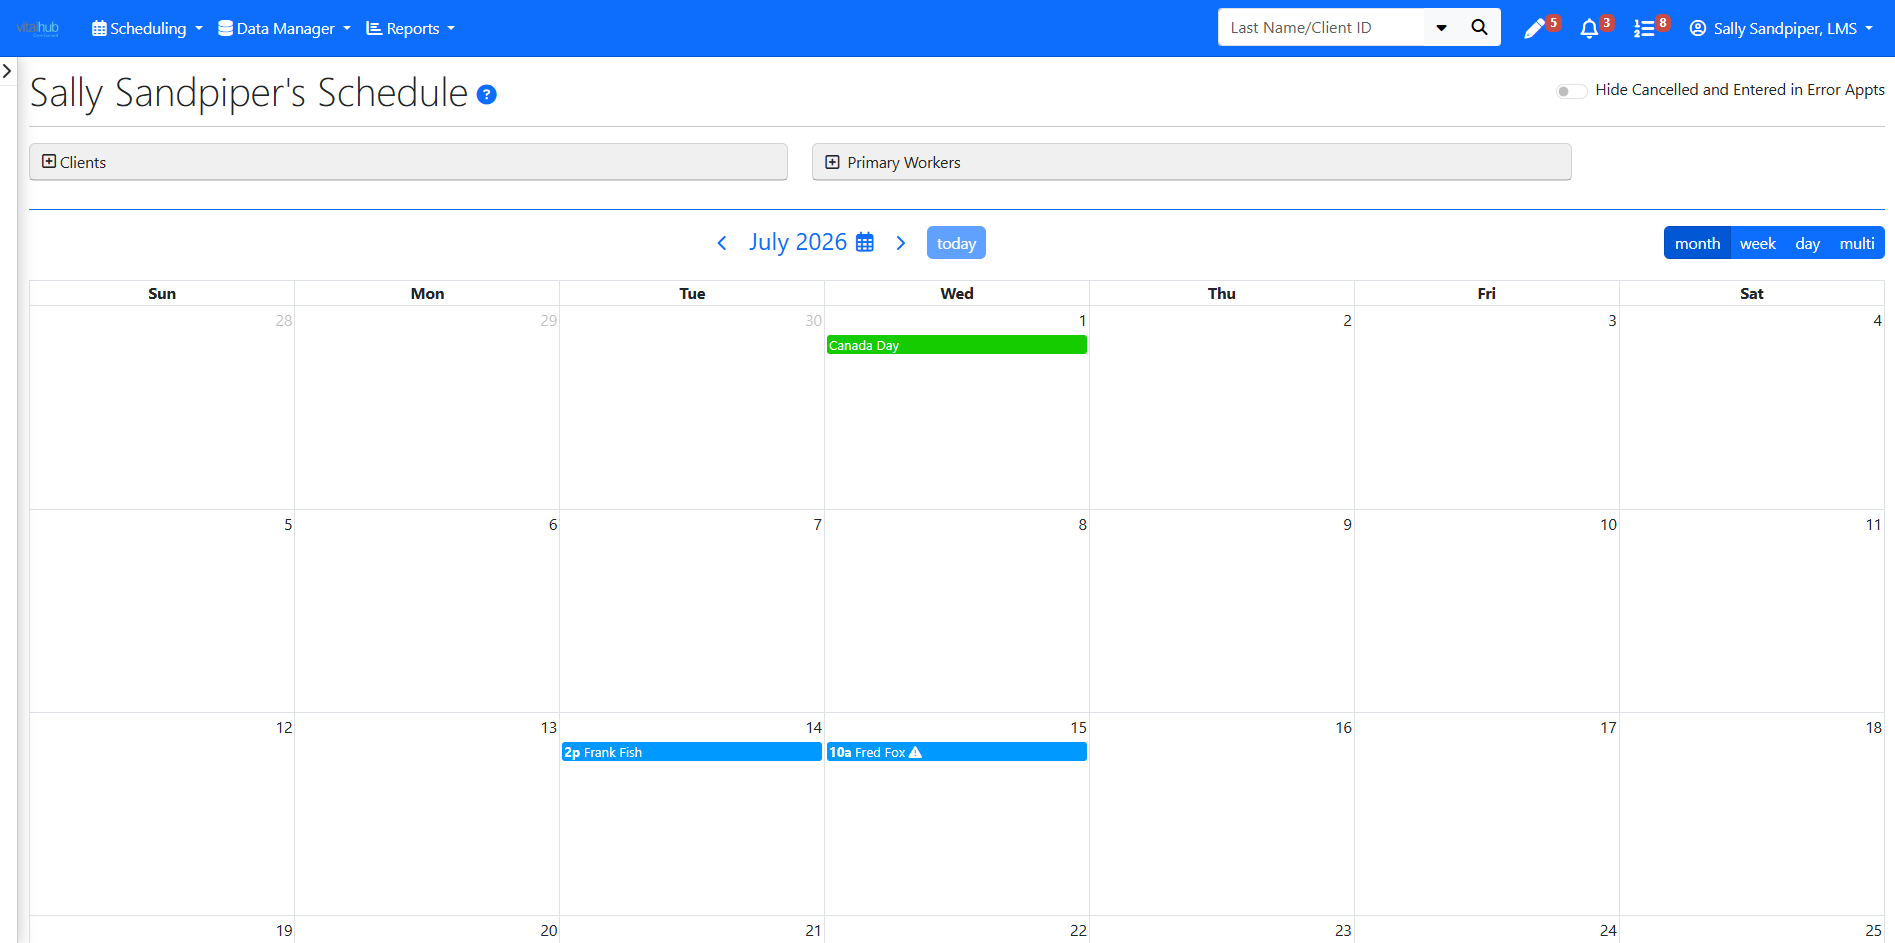
Adding an Appointment
- Open Schedule, Client Schedule, or select Create an Appointment, then click the date for the appointment.
- Select the appropriate Appointment Type and Program, then confirm the appointment date, start time, and end time.
- Add the client and assign the appropriate worker(s) who will be participating in the appointment.
- Complete any additional appointment details, such as encounter type, visit type, site, service, or location, as applicable.
- Review the appointment details and select Save to create the appointment and add it to the calendar.
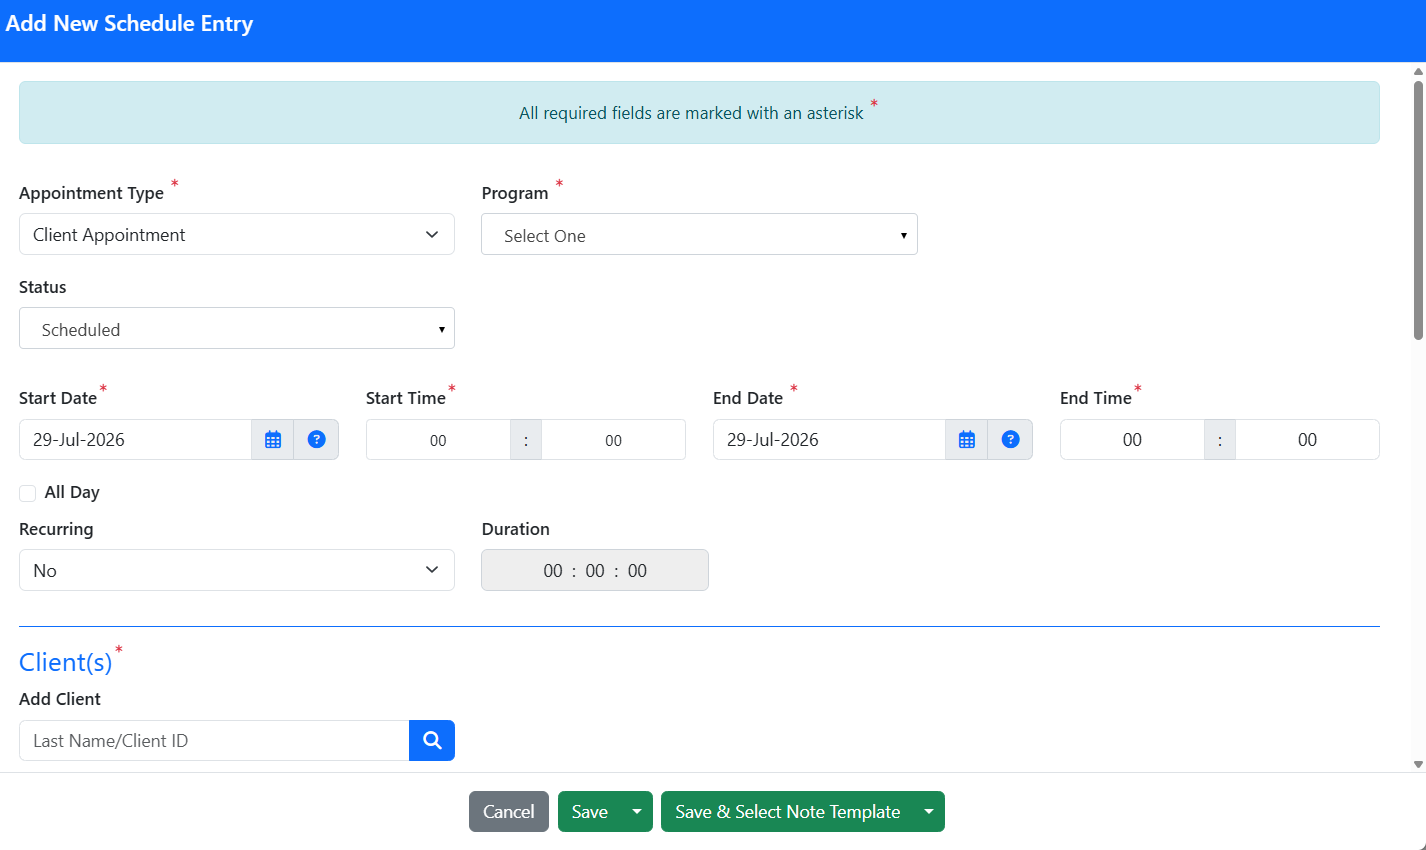
Key Fields
| Field | What to enter |
|---|---|
| Appointment Type | The type of appointment. Types are colour coded on the calendar. |
| Program | The program the appointment applies to. |
| Status | Defaults to Scheduled. Other statuses are set later, for example when marking attendance. |
| Time / Duration | Enter the start time if it is not defaulted. Duration is calculated for you. |
| Recurring | Change to Yes if this appointment should repeat. |
| Client | Enter the client if not defaulted. Multiple clients can be added when the appointment applies to more than one. |
| Worker | You are defaulted as the worker. Change or add workers or staff as needed. |
| Site | Optional. Applies when the organization has multiple physical locations. |
| Encounter Type | Predefined for MIS: Home, Community, Office, Email/Text/Letter, Telephone, or Video Conference. |
Multiple Clinicians on One Appointment
When more than one clinician is on an appointment, the lead is the worker who will write the progress note and enter workload through that note. The worker who is not lead enters their workload through the appointment and is listed as a collaborator on the note.

Saving and the Enrollment Warning
Select SAVE to save the appointment, or CANCEL to clear the entry without saving.
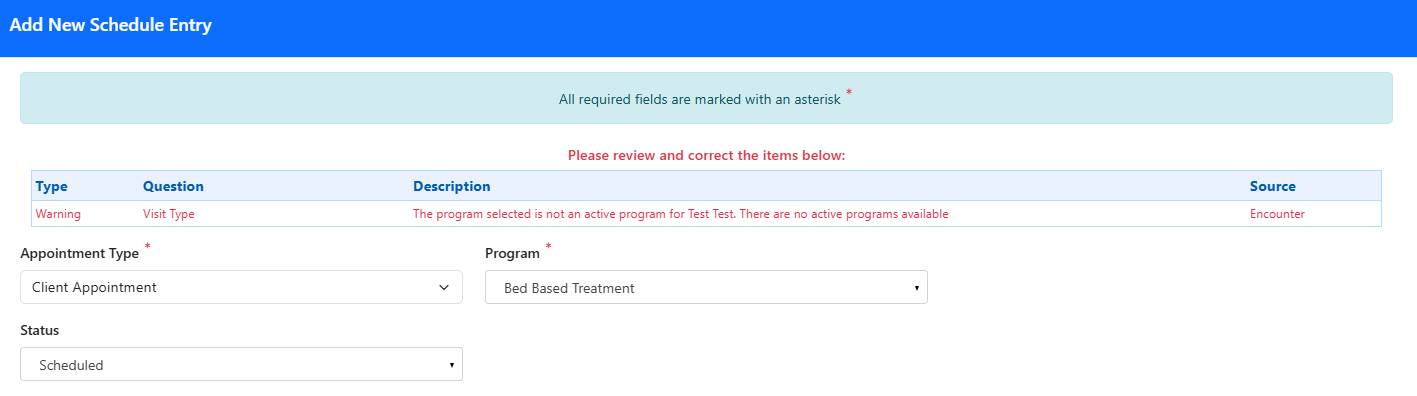
Program enrollment. If the client is not enrolled in an active program, a warning displays. You may need to select SAVE a second time to confirm the appointment.
Viewing an Appointment
To view an appointment after it is booked, click on the appointment in the calendar.
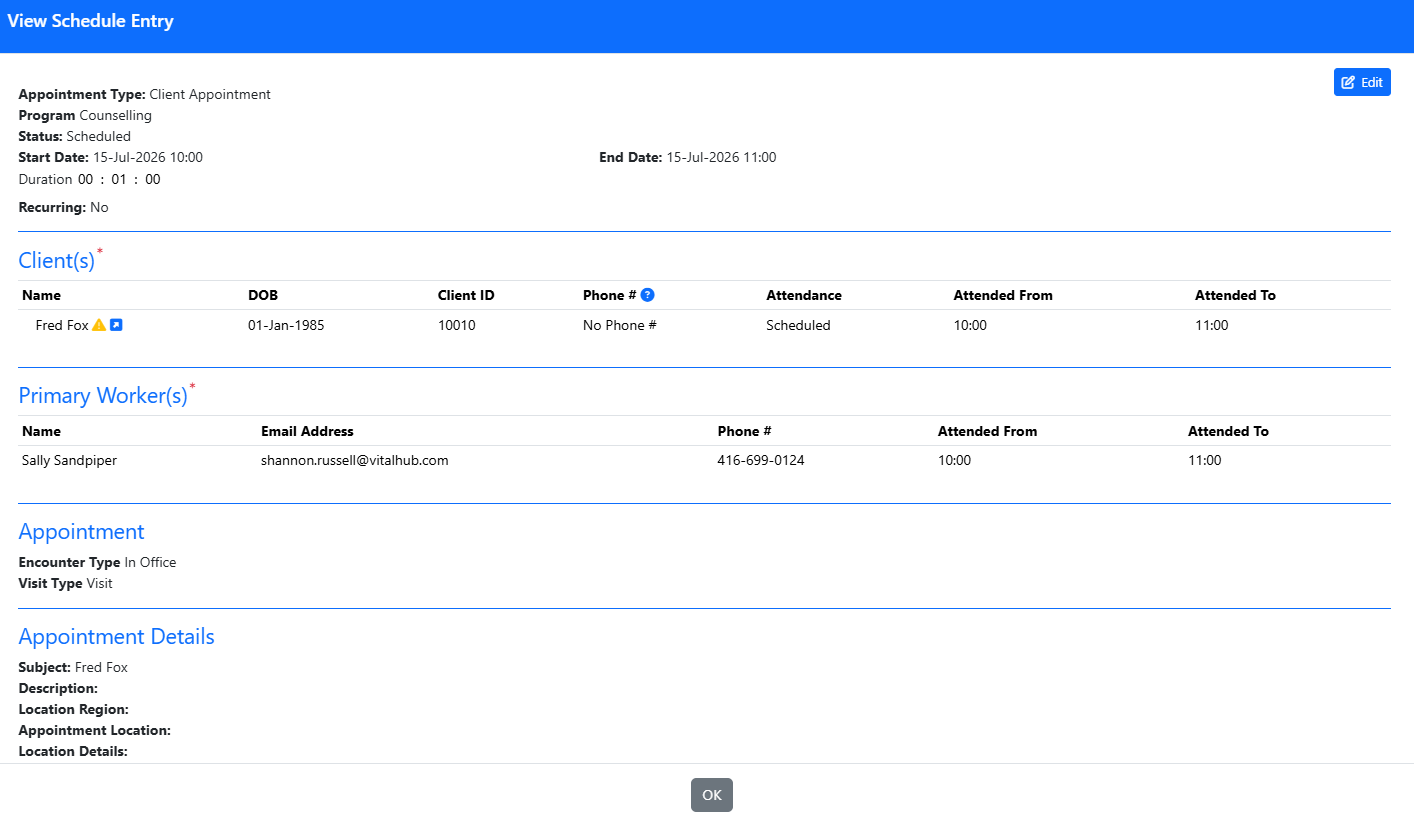
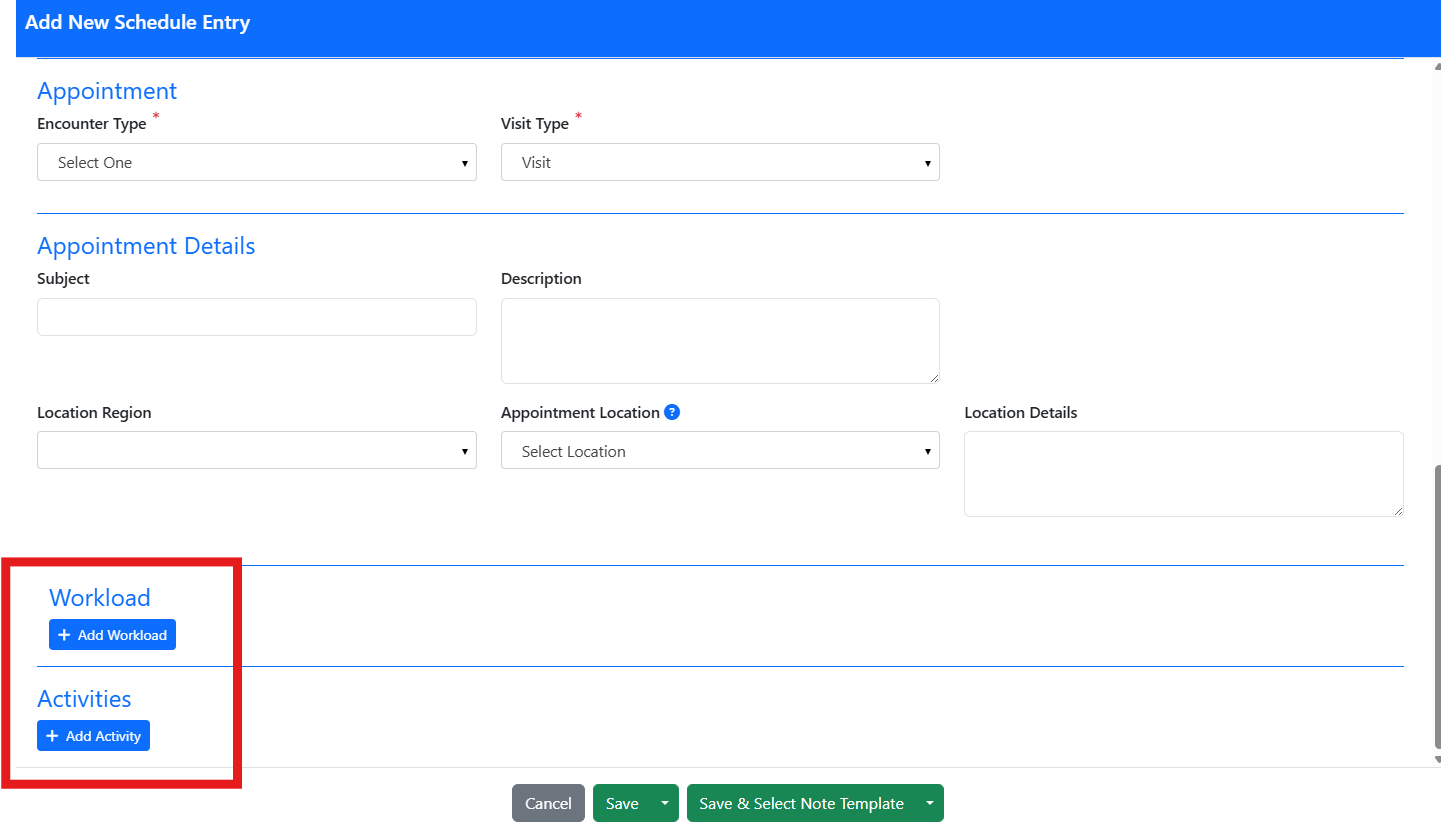
Linking Related Items
If required, an appointment can link to workload and activities.
Training Video
Creating an Appointment - User Instructions | Author: Michael Marchese | 2026-07-17
Was this article helpful?
That’s Great!
Thank you for your feedback
Sorry! We couldn't be helpful
Thank you for your feedback
Feedback sent
We appreciate your effort and will try to fix the article