TREAT - Lockbox
Creating a Full or Partial Lockbox
Overview
Only users with permission to place or remove a lock see the Lockbox option in the Left Panel. If you do not see it, you do not have that permission.
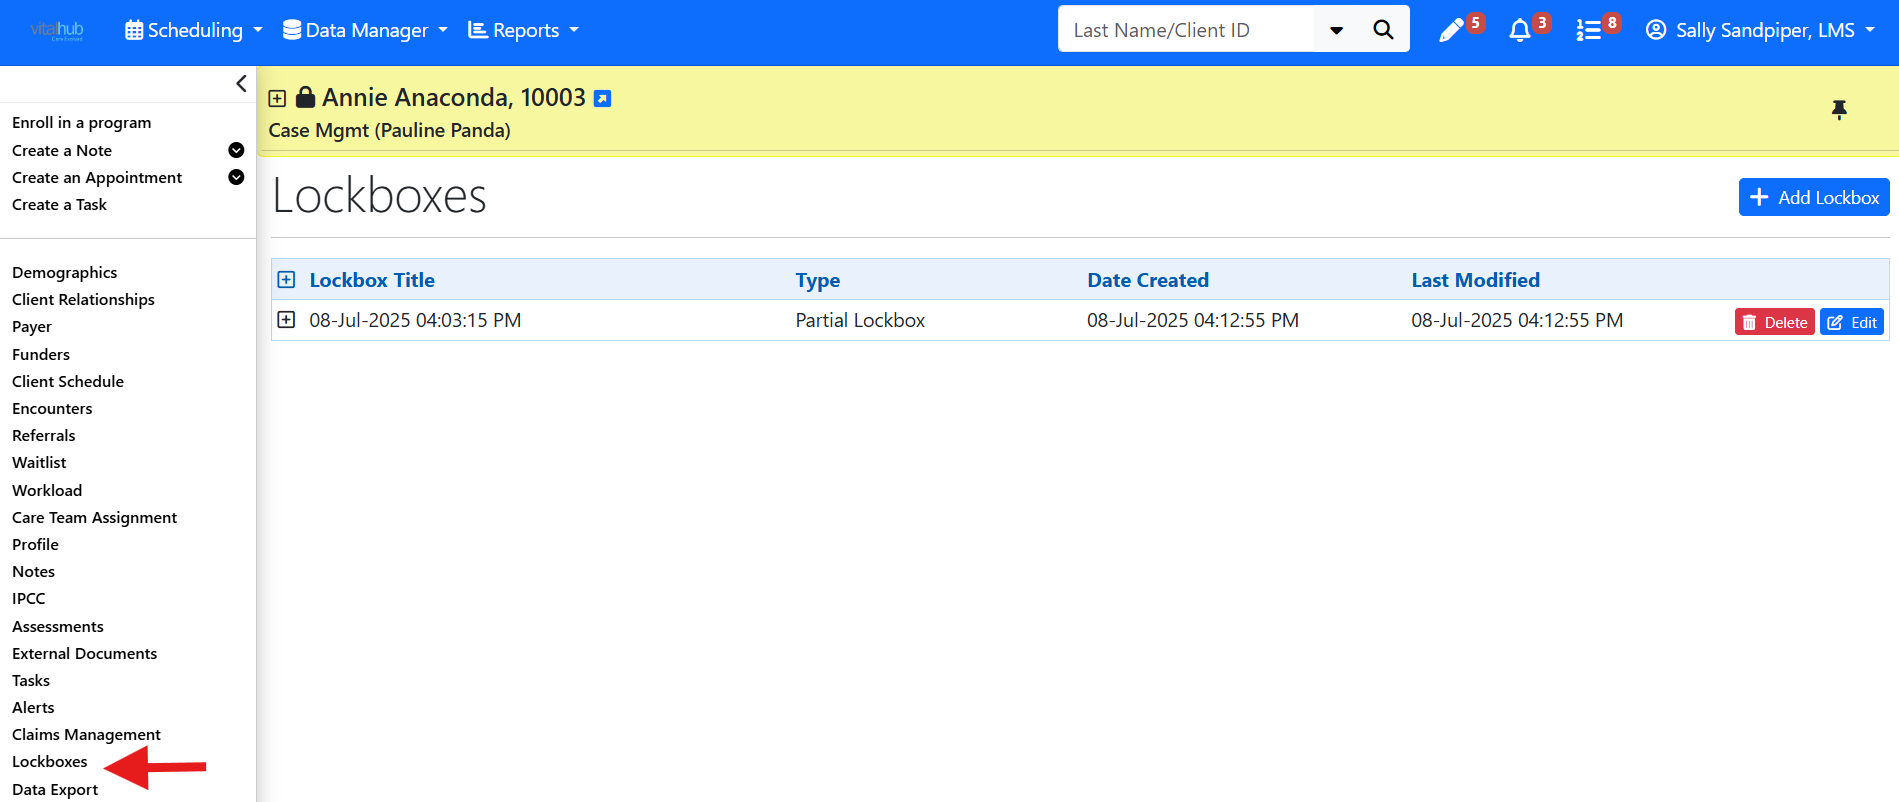
Creating the Lockbox
- Select Lockbox in the Left Panel, then Add Lockbox.
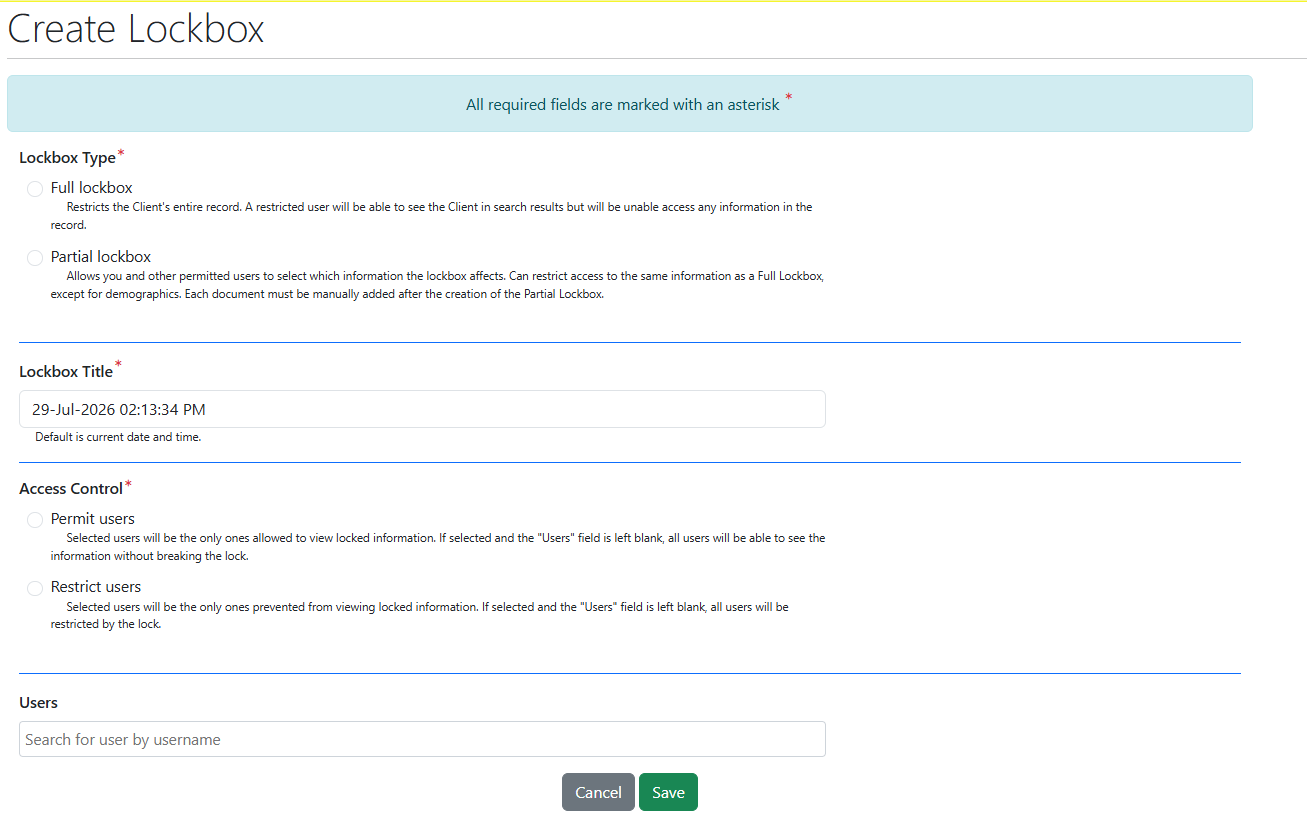
- Review the title. Best practice is to leave the date and time in the title and append text only if needed.
- Select the lockbox type.
- Set access control.
- Enter the worker or workers the access control applies to. The meaning of the worker list changes depending on which option you select.
- Select Save and confirm.
Lockbox Types
| Type | What it does |
|---|---|
| Full Lock | Restricts the client's entire record. A restricted user still sees the client in search but cannot view any data in the chart. Only one full lockbox is allowed per client. |
| Partial Lock | Restricts only the information you add to it (all chart data except demographics). Multiple partial lockboxes are allowed. You must add items before they are protected. |
Access Control: Permit vs Restrict
| Setting | Meaning |
|---|---|
| Permit | Only the workers listed can view the chart or locked records. |
| Restrict | Only the workers listed are locked out of the chart or locked record. |
Training Video
Creating a Full or Partial Lockbox - User Instructions | Author: Michael Marchese | 2026-07-17
Was this article helpful?
That’s Great!
Thank you for your feedback
Sorry! We couldn't be helpful
Thank you for your feedback
Feedback sent
We appreciate your effort and will try to fix the article